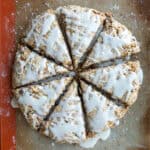
BEST Gluten-Free Scones (vegan option)
These gluten-free scones are buttery, flaky, and just a little bit sweet! Check the notes for tested dairy-free and vegan options plus endless variations to try.
Servings 8 scones
Calories 458kcal
Ingredients
WET INGREDIENTS
- ½ cup full fat coconut milk (120 ml)
- 1 large egg
- 2 teaspoons apple cider vinegar or white vinegar
- ½ teaspoon vanilla extract
DRY INGREDIENTS
- 2 cups + 2 tablespoons all purpose gluten-free flour (285 grams)
- ½ cup granulated sugar - I used coconut sugar but white or brown sugar will work too (70 grams)
- 2 ½ teaspoons baking powder
- ¼ teaspoon salt
MIX-INS
GLAZE
- ¾ cup powdered sugar (90 grams)
- 1-2 tablespoons coconut milk or other dairy-free milk
Instructions
- Prep: Preheat the oven to 350 degrees F (176 C). Line a baking sheet with a silicone liner or parchment paper, or grease generously.
- Wet Ingredients: In a small bowl or liquid measuring cup, whisk together the coconut milk, vanilla extract, egg, and vinegar. Set aside.
- Dry Ingredients: In a large mixing bowl, whisk together the gluten-free flour, sugar, salt, and baking powder.
- Add the Butter: Chop the cold butter into chunks and work it into the dough with a pastry cutter or your hands. When finished, the pieces of butter should be blueberry sized or smaller and it should be well distributed into the dough.
- Mix-ins: Add the dried coconut and chocolate chips to the butter and flour mixture and mix thoroughly.
- Form the Dough: Add the wet ingredients to the dry ingredients and gently mix with the spatula or spoon until just mixed but uniform in texture throughout. It is ok if your dough seems a bit dry.
- Form a Disc: Flour both hands generously and transfer the dough to the center of your prepared baking sheet. Use your hands to gently push the dough into a ball in the center of the baking sheet before gently pressing it into a disk about 7-8 inches in diameter. Cut the disk into 8 equal sections with a sharp knife. The texture may still be quite crumbly or a little more moist depending on the GF flour you use and the butter temperature, but in either case it should still turn out great!
- Bake: Bake for 22 minutes. Then remove the scones from the oven and use a greased knife or thin spatula to separate the wedges at least ½ inch from each other so they can crisp on all sides. Return to the oven for another 6-8 minutes or until the scones are set and lightly golden brown on the outside.
- Glaze: Meanwhile, add 1 tablespoon of coconut milk to to the powdered sugar and whisk until smooth. Add more coconut milk in small increments as desired to thin.
- Cool: Cool on a cooling rack before glazing . Or if you can't wait, allow 10 minutes to cool and drizzle on glaze just before eating!
Notes
See the blog post for troubleshooting, expert tips, and step-by-step photos.
Storage: After cooling completely, store leftover gluten-free scones in an airtight container at a cool room temperature for 2-3 days. In the refrigerator, they will last for 6-7 days and taste best when allowed to return to room temperature or warmed slightly.
Variations and Substitutions
- Vegan Gluten-Free Scones - Use vegan butter and replace the egg with 3 tablespoons of water. No egg replacers are needed. The texture is nearly the same but the scones do fall apart a little more easily. See the ingredients section in the blog post for more details on specific vegan ingredient substitutions I like.
- Dairy-Free Gluten-Free Scones - Use dairy-free butter. I like Earth Balance Vegan Buttery sticks for this recipe.
- Change the Mix-ins - As long as you don't exceed the 1 ⅓ cups of overall mix-ins I used in this recipe, your gluten-free scones will turn out great.
- No Mix-ins - For a classic, buttery, and slightly sweet scone recipe, omit the mix-ins all together. You will want to decrease the size of your dough-disk to about 6-7 inches since there is less overall dough.
- Savory Gluten-Free Scones - Use 2 tablespoons of sugar instead of ½ cup of sugar. Then add up to 2 cups of savory mix-ins like crispy crumbled cooked bacon, shredded cheddar cheese, and chives.
- For Gluten-Free Fruit Scones, check out my Gluten-Free Blueberry Scones!
Nutrition
Calories: 458kcal | Carbohydrates: 58g | Protein: 5g | Fat: 25g | Saturated Fat: 17g | Polyunsaturated Fat: 1g | Monounsaturated Fat: 4g | Trans Fat: 0.5g | Cholesterol: 54mg | Sodium: 310mg | Potassium: 130mg | Fiber: 4g | Sugar: 34g | Vitamin A: 388IU | Vitamin C: 0.3mg | Calcium: 116mg | Iron: 2mg