
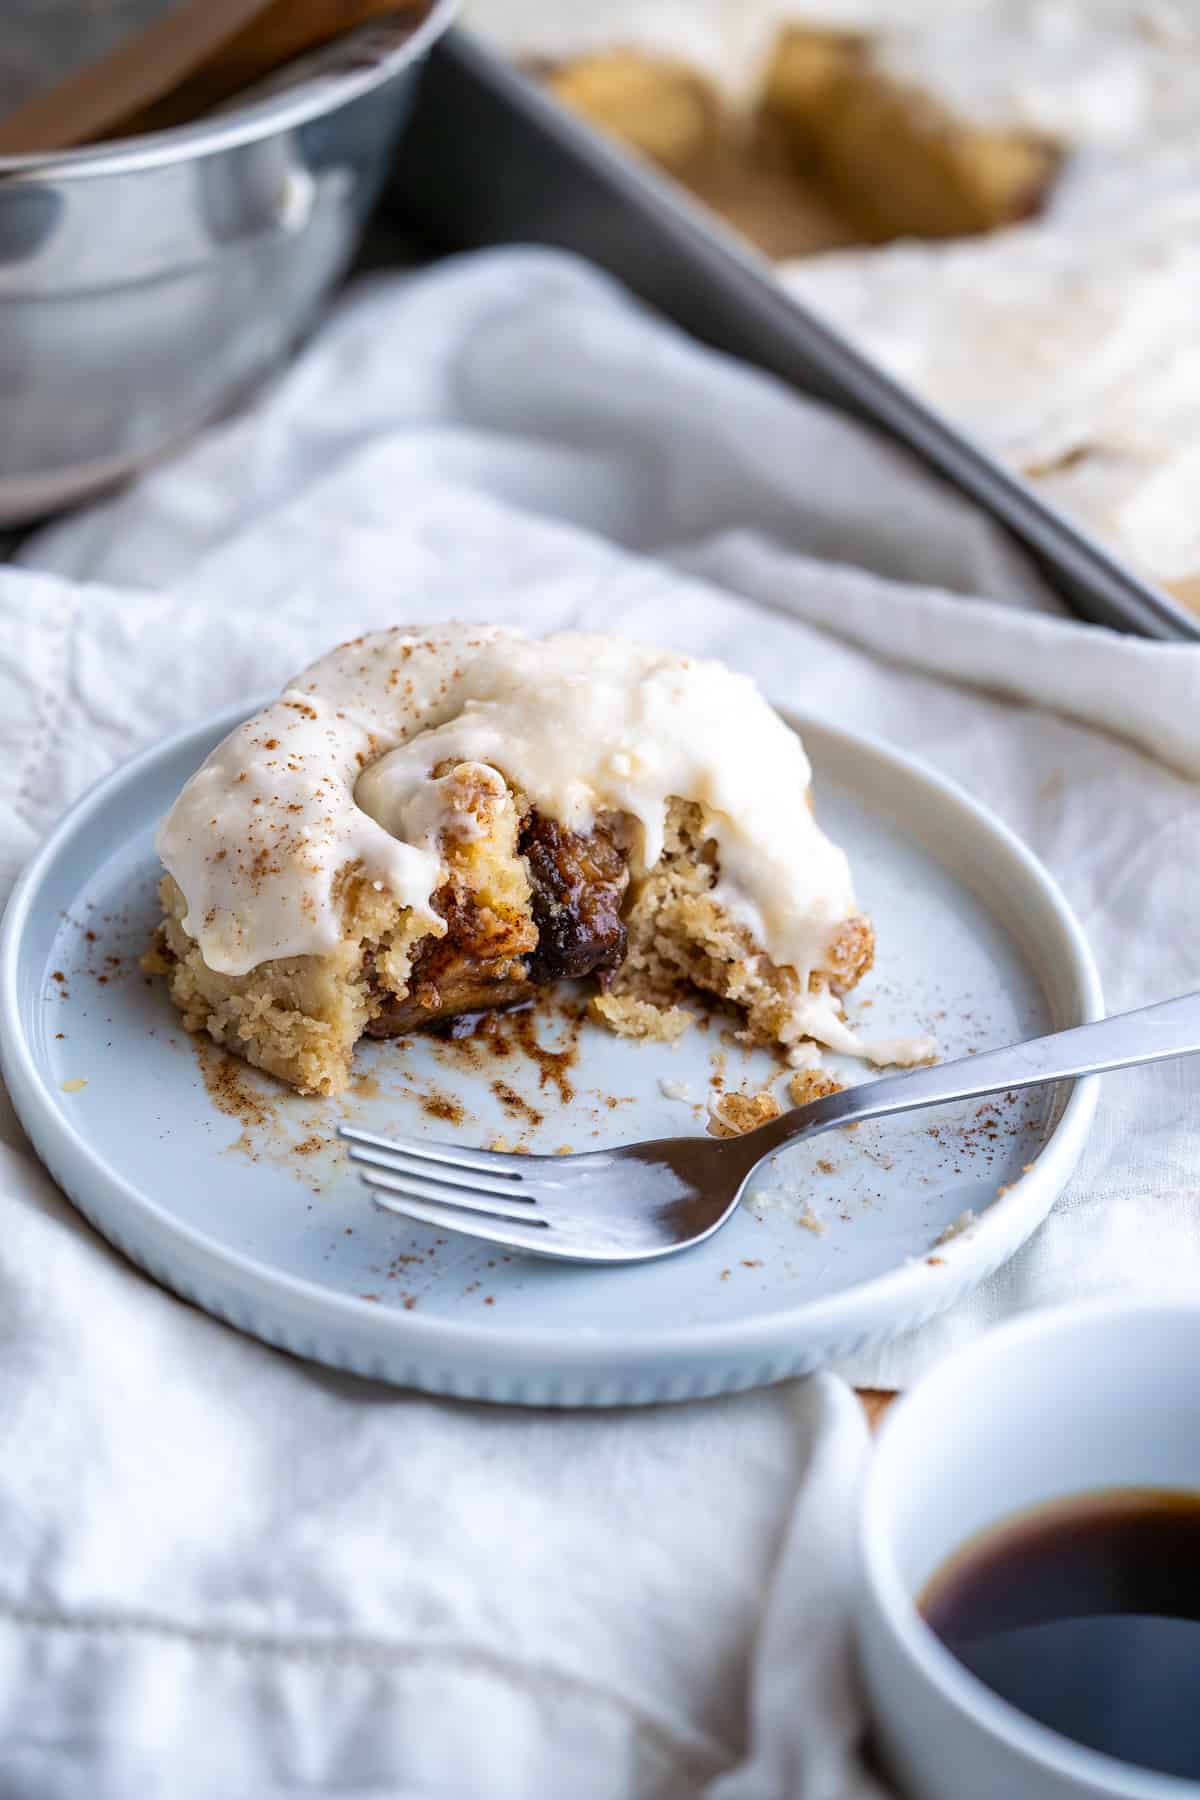
These classic Gluten-Free Cinnamon Rolls have an ooey-gooey center and buttery rolled dough that tastes just like the ones you remember... or even better since this homemade recipe uses only real butter, unlike popular chain stores like Cinnabon! Simply substitute dairy-free butter and milk to make them deliciously dairy-free and vegan. They are made with the traditional method using traditional ingredients.
Pull them apart, hold and take a bite, or eat it with a fork -- we made sure this recipe holds up to any tried-and-true cinnamon-roll-eating strategies! And if you're terrible at following instructions like I am, know that you can accidentally roll them the wrong way, cut them too thin, or place them wrongly in the pan and they will still turn out great.
We made many "errors" but as long as the ingredients were right, this recipe tasted great!
Believe it or not, these gluten-free cinnamon rolls are beginner-friendly! They use only 11 common ingredients and our step-by-step photos will help your visualize the steps needed to make them. They are surprisingly resilient to the mistakes I made (on purpose and not!) while recipe testing.
The number one rule you can't break is introducing a liquid that's too hot and can kill the yeast. But I'll get into the details of this in the post as well as the notes of the recipe card.
We LOVE to make these gluten-free cinnamon rolls for weekend mornings, birthday breakfasts, and of course, Christmas Morning! I included some of our favorite variations in the "how to make it" section of this post, below.
If you're looking for more delicious gluten-free breakfast treats to make on weekend mornings or special occasions, check out my BEST Gluten-Free Scones, Gluten-Free Chocolate Muffins, Gluten-Free Blueberry Scones, Almond Flour Pumpkin Muffins, Gluten-Free Blueberry Muffins, Coconut Crunch French Toast, Classic Dairy-Free French Toast, Gluten-Free Strawberry Muffins, and Gluten-Free Chocolate Chip Muffins.
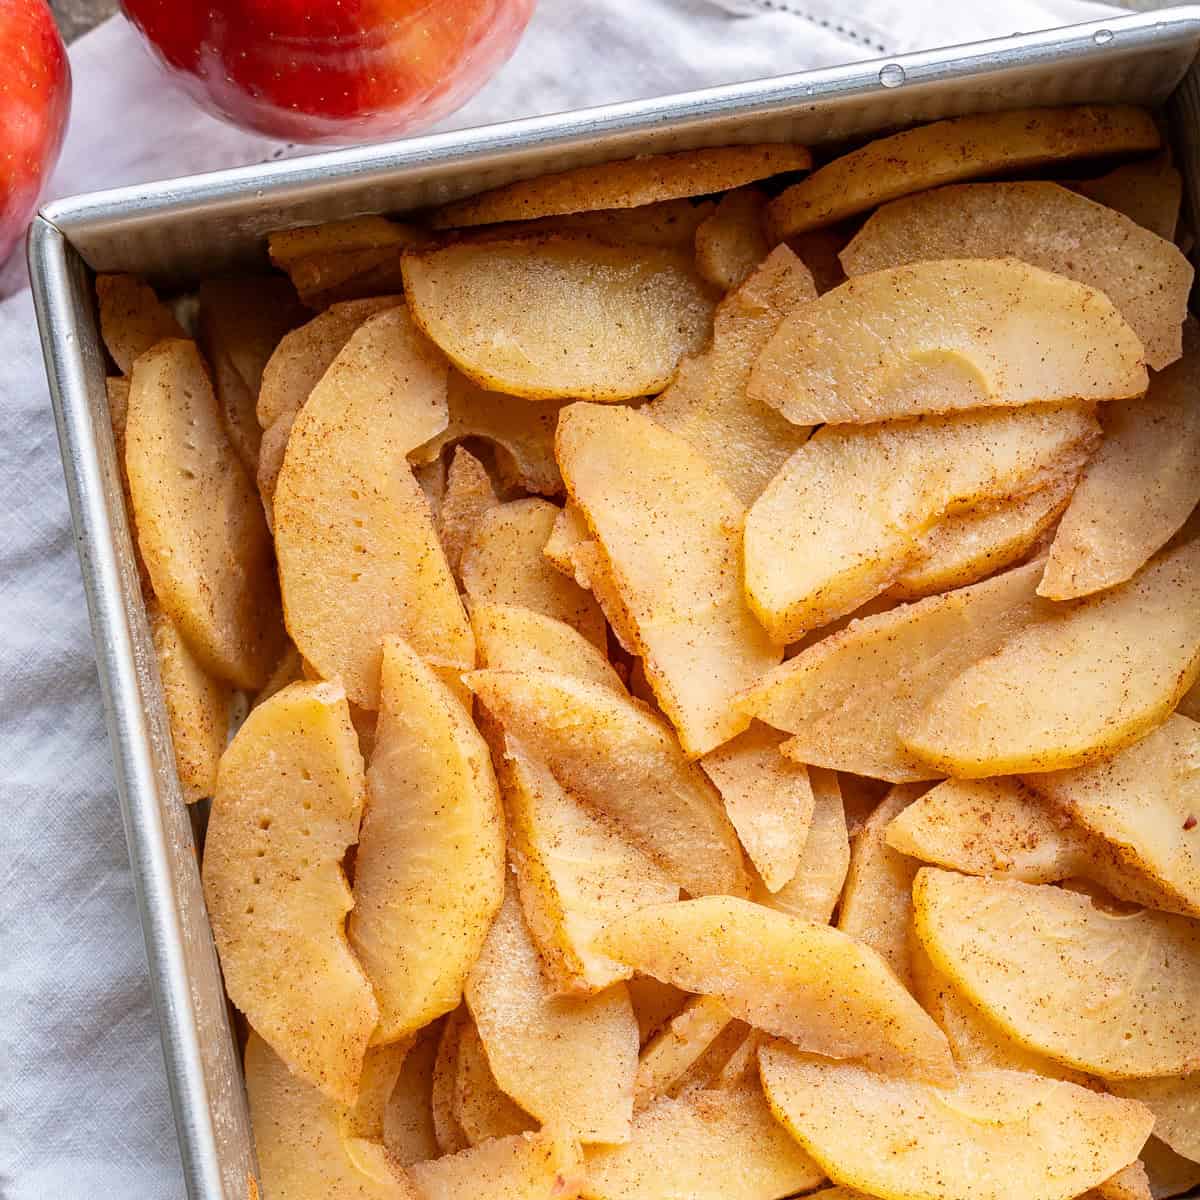
Or if streusel and coffee cake are your thing, check out my Gluten-Free Apple Coffee Cake and Strawberry Rhubarb Coffee Cake.

How to make it (with photos)
Ingredients Notes + Substitutions
You need only 11 common ingredients to make these delicious gluten-free cinnamon rolls! There are no unusual ingredients, no eggs, and can easily be made dairy-free and vegan with your favorite dairy-free milk and butter substitutions, as well as coconut cream in place of cream cheese in the frosting!
I included my favorite substitutions for this recipe in the notes below the photo.

All Purpose Gluten-Free Flour with xanthan gum
I used Bob's Red Mill 1-to-1 gluten-free baking flour for this recipe. If using a flour without xanthan gum, add ½ teaspoons of xanthan gum to your dry ingredients mixture and mix in. Because we are using yeast in this recipe, a binder like xanthan gum is necessary.
There is at least one gluten-free flour that says "do not use in yeasted recipes" on the bag. I have not tried all of these, but I know Bob's Red Mill 1-to-1 works fine in yeasted recipes despite this warning on the bag. I also use it for my Gluten-Free Artisan Bread and Gluten-Free Sandwich Bread recipes.
Butter or Vegan Butter
I tried regular salted butter and Earth Balance Vegan Buttery Sticks in this recipe and both work perfectly! If using unsalted butter, add an extra ¼ teaspoon of salt to the dough.
If using regular butter, it's very easy to brown the butter in a pot on the stove when you melt it, before adding the other wet ingredients. This optional step will give the cinnamon rolls that nutty browned butter flavor that many people love!
Psyllium Husk Powder
Psyllium husk powder replaces gluten in this recipe to make sure your cinnamon rolls stay together and stay soft. They also freeze and reheat better with this magical ingredient.
You can make these cinnamon rolls even without psyllium husk powder (see the "how to make it without psyllium husk" section).
Cream Cheese
If making these gluten-free cinnamon rolls dairy-free and vegan, coconut cream makes an excellent 1-for-1 substitution for cream cheese in the cream cheese frosting recipe! Use a can of full fat coconut milk or a can labeled "coconut cream".
Make sure it's cold enough that the coconut cream has separated from the liquid, and use just the solid cream part to replace the cream cheese.
More Ingredient Notes
- milk - I tested 2% dairy milk and unsweetened almond milk in my recipe trials. Both turned out great!
- maple syrup - If you don't have maple syrup, honey is an excellent alternative.
- active dry yeast - I used Red Star Active dry yeast for the cinnamon roll dough.
- brown sugar - I like the flavor of brown sugar best, but white sugar makes a fine replacement.
- powdered sugar - If you are intolerant to corn, Wholesome brand makes a powdered sugar with tapioca starch instead of cornstarch.
You also need salt, vanilla extract, and ground cinnamon to make this recipe.
See the recipe card at the end of this post for a full list of ingredients and quantities.
Variations
This gluten-free cinnamon rolls recipe was tested with dairy-free and vegan ingredients and works out perfectly! We also tried adding crushed nuts to the filling and loved that variation as well.
Keeping checking this section, because we have a couple other fun variations we're working on behind the scenes!
Double Batch
For a double batch, use a 9 x 13 inch baking pan (metal pan preferred). Double the recipe and roll the dough into a 12 by 16 inch rectangle. The dough strips will be 12 inches long and about 1 ⅓ inches wide.
Place them in the baking pan with 3 rolls across the short end and 4 rolls across the long end. Bake as listed in the recipe.
Vegan + Dairy-Free Cinnamon Rolls
Since the only animal products in this recipe are dairy ingredients, the vegan and dairy-free substitutions are the same. Use dairy-free butter and unsweetened almond milk in equal amounts to replace the butter and milk in this recipe. For the cream cheese frosting, use the same amount of solid coconut cream to replace the cream cheese.
Read the section on "ingredients + substitutions" above for links to the dairy-free and vegan brands I used in my recipe trials, as well as tips for using coconut cream in place of cream cheese.
Browned Butter Cinnamon Rolls
Brown the butter before adding the milk and other wet ingredients to the saucepan for a nutty and bold flavor variation. This does not work with most dairy-free butter substitutions.
Crushed Nuts in the filling
Add crushed pecans, hazelnuts, or other favorite nut to the filling of the cinnamon rolls if you like!
Equipment
To make the best gluten-free cinnamon rolls recipe, you only need common kitchen equipment:
- mixing bowls
- whisk
- spatula
- parchment paper
- rolling pin
- baking pan (a round 8-9 inch cake pan or an eighth sheet pan for 6-7 rolls, or a 9x13 inch pan for 12 rolls)
I also recommend silicone baking sheets to contain the mess. They're also very useful if making this gluten-free cinnamon rolls recipe without psyllium husk powder. I bought one extra large silicone liner for this recipe and use it for all my cutout cookies and gluten-free bread recipes as well!
Step-by-Step Instructions
Use these photos and our detailed step-by-step instructions to get perfect gluten-free cinnamon rolls on the first try!

- Milk + Yeast: Warm the milk to 110-115 degrees F in the microwave or on the stove (no more than 120 degrees F, or it could kill the yeast). Then add the maple syrup and stir to combine. Then add the yeast, stir, and set aside for 5 minutes to activate the yeast. After 5 minutes, the mixture should begin frothing. If not, wait an additional 5 minutes. If no frothing occurs, you need to start over because the yeast is bad.
- Make the dough: In a large mixing bowl, combine the gluten-free flour, psyllium husk powder, and salt. Whisk to combine. Then add the milk mixture and melted butter. Stir with a spatula or wooden spoon until well combined. Then wait 5 minutes for the dough to solidify.
- Knead: On a lightly floured surface with lightly floured hands, knead the dough for about 5 minutes. This adds a little stretch to the dough to help it rise nicely without cracking. When finished, the dough should be soft, smooth, and uniform with a little spring back when poked with a finger. If the dough is too soft, place it in the refrigerator for up to 30 minutes before trying again.
- Filling: Using a lightly floured rolling pin, roll the dough into a rectangle that is about 10 inches by 12 inches. Use your fingers or a silicone brush to smooth the melted butter across the dough, reaching the edges on all except for one inch on one of the shorter sides. Whisk together the brown sugar and cinnamon before sprinkling it evenly over the butter.
- Roll and rise: Cutting along the longer side (so dough strips are 12 inches long), cut 7 strips of dough that are about 1 ½ inches wide. Roll them snugly (but gently) from the sugared edge to the bare edge. Tuck the end of the bare edge underneath the cinnamon roll. Arrange the rolls evenly in an 8 or 9 inch cake pan that has been greased or lined with parchment paper. Cover with a tea towel and leave in a warm place for 1 - 1 ½ hours or until the rolls have double in size.
- Bake: Preheat the oven to 325 degrees F. Bake the rolls on a middle oven rack for 35-45 minutes or until the internal temperature of a gluten-free cinnamon roll is between 190 and 200 degrees F. Remove from the oven and allow to cool for 10 minutes.
- Frosting: Meanwhile, make the frosting by adding the softened butter, cream cheese or coconut cream, and vanilla extract to a bowl. Mix well with an electric mixer. Then add the powdered sugar 1 cup at a time and mix in. Frost the tops of the cinnamon rolls and enjoy!

How to make it without psyllium husk
To make this gluten-free cinnamon rolls recipe without psyllium husk powder, the ingredients are the same (except you omit psyllium husk of course). However, the instructions are a little different.
Replace steps 3-5 of the original recipe with these steps:

- Step 3a: Refrigerate: After mixing the dough, cover loosely with plastic wrap and refrigerate for at least an hour or up to overnight. This helps the butter to solidify and makes the dough easier to work with. It will be soft and very sticky.
- Step 3b: Roll the dough: Generously dust a large silicone baking mat or piece of greased parchment paper with gluten-free flour. Push the cold dough from the bowl into the center of the mat using a spatula. Use well-floured hands to push the dough loosely into a mound in the center of the mat. Then generously dust the surface of the dough with more gluten-free flour. Place a large piece of parchment paper over the dough before rolling it into a large 10 by 12 inch rectangle. Gently peel off the top layer of parchment paper and use floured hands to nudge (or cut and redistribute) any uneven edges into the rectangle. Generously dust with gluten-free flour anytime you replace the parchment paper and re-roll the dough.
- Step 4: Filling: Mix and add the filling as listed in the recipe card.
- Step 5: Roll: Starting at the long end opposite the one left clear for sealing, use the parchment paper to begin rolling the dough inward. Keep the roll as tight as you reasonably can and peel the parchment paper back as you go along so it does not get stuck in the roll. When finished rolling, use a sharp greased knife to trim off any loose ends of dough and cut the remaining dough roll into 6 equal gluten-free cinnamon rolls. Wipe clean and re-grease the knife as needed. Place these rolls evenly in the baking pan and follow the original instructions for rising and baking times and temperatures.
The gluten-free cinnamon roll spirals will be a little less defined without psyllium husk powder, but they still taste great!
Expert Troubleshooting Tips
I made more than several errors while developing this incredible gluten-free cinnamon rolls recipe recipe! Here are some troubleshooting tips from my experience, should you find yourself in a similar situation.
The dough doesn't double in size on the first rise.
There are two main reasons why your dough would not rise as expected. They are:
- Room temperature is too cold. In the winter, my house usually runs around 68 degrees F. This is too cold for a normal yeast dough rise. If this is also the case for you, use your oven's bread proof setting, or follow the steps listed in the notes of the recipe card below to use your oven without a bread proof setting.
- Your yeast is dead, or partially dead. Over time, stored yeast can die. Therefore, it's always a good idea to proof your yeast, especially if you haven't used it in a while. Yeast only tolerates temperatures up to 130 degrees F. Therefore if you heat the wet ingredients too much and/or you don't allow it to cool to below 130 degrees F, you may have killed some of the yeast.
You used coconut cream in the frosting and over-whipped the cream.
Just like regular whipping cream, coconut cream can be over-whipped. You know this is happening when your almost-smooth frosting deteriorates and gets wetter and lumpier.
The good news is that you can still eat and serve the over-whipped frosting. It still tastes delicious! However, you may be looking to improve the texture or appearance.
The bad news is that the I haven't been able to fully get it back to the texture before over-whipping. But that doesn't mean it can't be improved! Here's what to do:
- First, refrigerate the frosting for up to an hour to help it thicken a bit.
- Then add 2 tablespoons of cold dairy-free milk and whip the mixture for only 30 seconds.
- You can repeat steps 1 and 2 one more time if you like.
To prevent over-whipping the frosting in the future, mix the frosting only until it is just mixed. There may still be some small lumps of coconut cream in the mixture. The photos in this post are of the coconut cream and vegan variation of this recipe, and you can see some of the small lumps if you look closely.
You rolled the dough the wrong way.
Been there, done that my friend! Twice actually.
The good news is that you will have even more cinnamon swirls in each roll, since it was technically rolled over more times.
The bad news is that the dough is a little more difficult to manage (if making it without psyllium husk powder) and your rolls will be a little shorter.
Still cut the roll into equal slices. Each one will be about an inch tall. You will need to use a spatula and be careful when moving them to the pan. If the roll falls apart, do your best to somewhat repair it with your fingers.
Follow the recipe as listed and remember that the taste is more important than the appearance!

Recipe FAQs
Here I answered some frequently asked questions about how to make gluten-free cinnamon rolls. If you don't see your question, leave it in the comments below and I'll answer within two business days.
Store leftover gluten-free cinnamon rolls in an airtight container in the refrigerator for up to 5 days. Freeze baked rolls for up to 2-3 months.
If making this recipe without psyllium husk powder, the gluten-free cinnamon roll dough can get very sticky. Therefore, it's very important to use ultra nonstick surfaces when rolling the dough. You can try to do it with just a rolling pin and your hands, but it will require lots of extra flour and still get pretty messy!
The only key difference between these gluten-free cinnamon rolls and traditional ones is the gluten-free flour. However, gluten-free flour absorbs more liquid, so therefore there is also more butter and milk in this recipe compared to others. We found that it was necessary to increase the liquid for a proper yeast rise with gluten-free flour.
Related gluten-free breakfast recipes to consider...
Looking for more delicious sweet gluten-free breakfast treats like these gluten-free cinnamon rolls? I think you'll also love these!


Love this recipe? Please leave a 5-star 🌟🌟🌟🌟🌟 rating in the comment section or recipe card below. Thank you!
📖 Recipe

Gluten-Free Cinnamon Rolls
Ingredients
Dough
- 1 cup + 2 tablespoons milk (dairy milk or unsweetened almond milk)
- ¼ cup maple syrup
- 1 ¼ teaspoon active dry yeast
- 2 ¼ cups All Purpose Gluten-Free Flour with xanthan gum, plus more for dusting hands and surfaces (I used Bob's Red Mill 1-to-1 GF Baking Flour, 308 grams)
- 1 ½ tablespoons psyllium husk powder
- ½ teaspoon salt
- 6 tablespoons salted butter , melted but not hot
Filling
- ¼ cup brown sugar , lightly packed
- ½ tablespoon cinnamon
- 3 tablespoons salted butter , melted but not hot
Frosting
- 4 tablespoons salted butter softened at room temperature
- 2 ounces cream cheese or the solid part of a can of coconut cream for vegan, softened at room temperature (¼ cup)
- ½ teaspoon vanilla extract
- 2 cups powdered sugar
Instructions
- Milk + Yeast: Warm the milk to 110-115 degrees F in the microwave or on the stove (no more than 120 degrees F, or it could kill the yeast). Then add the maple syrup and stir to combine. Then add the yeast, stir, and set aside for 5 minutes to activate the yeast. After 5 minutes, the mixture should begin frothing. If not, wait an additional 5 minutes. If no frothing occurs, you need to start over because the yeast is bad.
- Make the dough: In a large mixing bowl, combine the gluten-free flour, psyllium husk powder, and salt. Whisk to combine. Then add the milk mixture and 6 tablespoons of melted butter. Stir with a spatula or wooden spoon until well combined. Then wait 5 minutes for the dough to solidify.
- Knead: On a lightly floured surface with lightly floured hands, knead the dough for about 5 minutes. This adds a little stretch to the dough to help it rise nicely without cracking. When finished, the dough should be soft, smooth, and uniform with a little spring back when poked with a finger. If the dough is too soft, place it in the refrigerator for up to 30 minutes before trying again.
- Filling: Using a lightly floured rolling pin, roll the dough into a rectangle that is about 10 inches by 12 inches. Use your fingers or a silicone brush to smooth 3 tablespoons of melted butter across the dough, reaching the edges on all except for one inch on one of the shorter sides. Whisk together the brown sugar and cinnamon before sprinkling it evenly over the butter.
- Roll and rise: Cutting along the longer side (so dough strips are 12 inches long), cut 7 strips of dough that are about 1 ½ inches wide. Roll them snugly (but gently) from the sugared edge to the bare edge. Tuck the end of the bare edge underneath the cinnamon roll. Arrange the rolls evenly in an 8 or 9 inch cake pan that has been greased or lined with parchment paper. Cover with a tea towel and leave in a warm place for 1 - 1 ½ hours or until the rolls have double in size.
- Bake: Preheat the oven to 325 degrees F. Bake the rolls on a middle oven rack for 35-45 minutes or until the internal temperature of a gluten-free cinnamon roll is between 190 and 200 degrees F. Remove from the oven and allow to cool for 10 minutes.
- Frosting: Meanwhile, make the frosting by adding the 4 tablespoons of softened butter, cream cheese or coconut cream, and vanilla extract to a bowl. Mix well with an electric mixer. Then add the powdered sugar 1 cup at a time and mix in. Frost the tops of the cinnamon rolls and enjoy!

Jean says
These are the best gluten-free cinnamon rolls! I tried the new recipe with psyllium husk fiber powder, and it was so easy. I made a double batch and really appreciated the notes on the rectangle size and rolling. I’m going to make some of your gluten-free breads next!
Lila says
We made these gluten-free cinnamon rolls for Mother’s Day and they were a hit! We used the vegan substitutions
Jamie says
I'm so glad to hear it Lila!
Kate says
I love that I can make these gluten free cinnamon rolls with my regular go-to gluten free flour and no weird or “extra” ingredients. They are delicious. Thank you.
Jamie says
Thank you for sharing Kate!
Cora says
Hands down the BEST gf cinnamon rolls recipe! They’re made just like the ones I made when I could still have gluten. I always appreciate that you try your best to keep the ingredients and process as true to the authentic as possible. The experience is just as valuable to me as the finished product ❤️
Jamie says
This made my day! Thank you so much for sharing these kind words, Cora 🙂
Bailey says
These worked perfectly! The dough is definitely a little sticky but the instructions are great for avoiding touching it and still getting nice rolls. We’ll make it again!
Jamie says
Thank you for sharing your experience!
Julia S says
Ive been passing this recipe around to friends and family. Everyone loves it! Thank you for making it accessible and not using unusual ingredients!
Barb says
We made these dairy free and vegan cinnamon rolls and they were just amazing! It was wonderful sharing them with family.
Saidah Branch says
can you substitute any oil for the butter? I cannot have vegan butters also. I cannot have corn, gluten, eggs dairy.
Jamie says
Hi Saidah, I think you could substitute coconut oil in the dough and filling, but I wouldn't use an oil that is liquid at room temperature (like avocado or vegetable oil). To get the same dough texture, you would want to replace the butter in the dough with about 80% the amount of coconut oil and use water or dairy-free milk for the remaining bit. Here's what that would look like:
- Dough: 10 tablespoons of coconut oil, 2 tablespoons water or DF milk
- Filling: substitute coconut oil 1-for-1 (6 tablespoons)
- Frosting: I would not use coconut oil in the frosting. I would double the coconut cream or select a different frosting recipe that fits your dietary needs better. Also, since you can't have corn, you will need to choose a powdered sugar without cornstarch (Wholesome brand, linked in the ingredients section of my post, makes a powdered sugar with tapioca starch instead of cornstarch).
I haven't tried this exact combination in my recipe testing, but from previous experiences I wouldn't hesitate to make these substitutions. Happy baking!
Cora says
It is SO nice to feel like I'm eating normally again! These cinnamon rolls are so buttery, the frosting tastes authentic, and the cinnamon roll center is just as you said, gooey and delicious! I made the dairy-free variation and my husband and I could not tell the difference.
Jamie says
I'm so glad you enjoyed them Cora!