
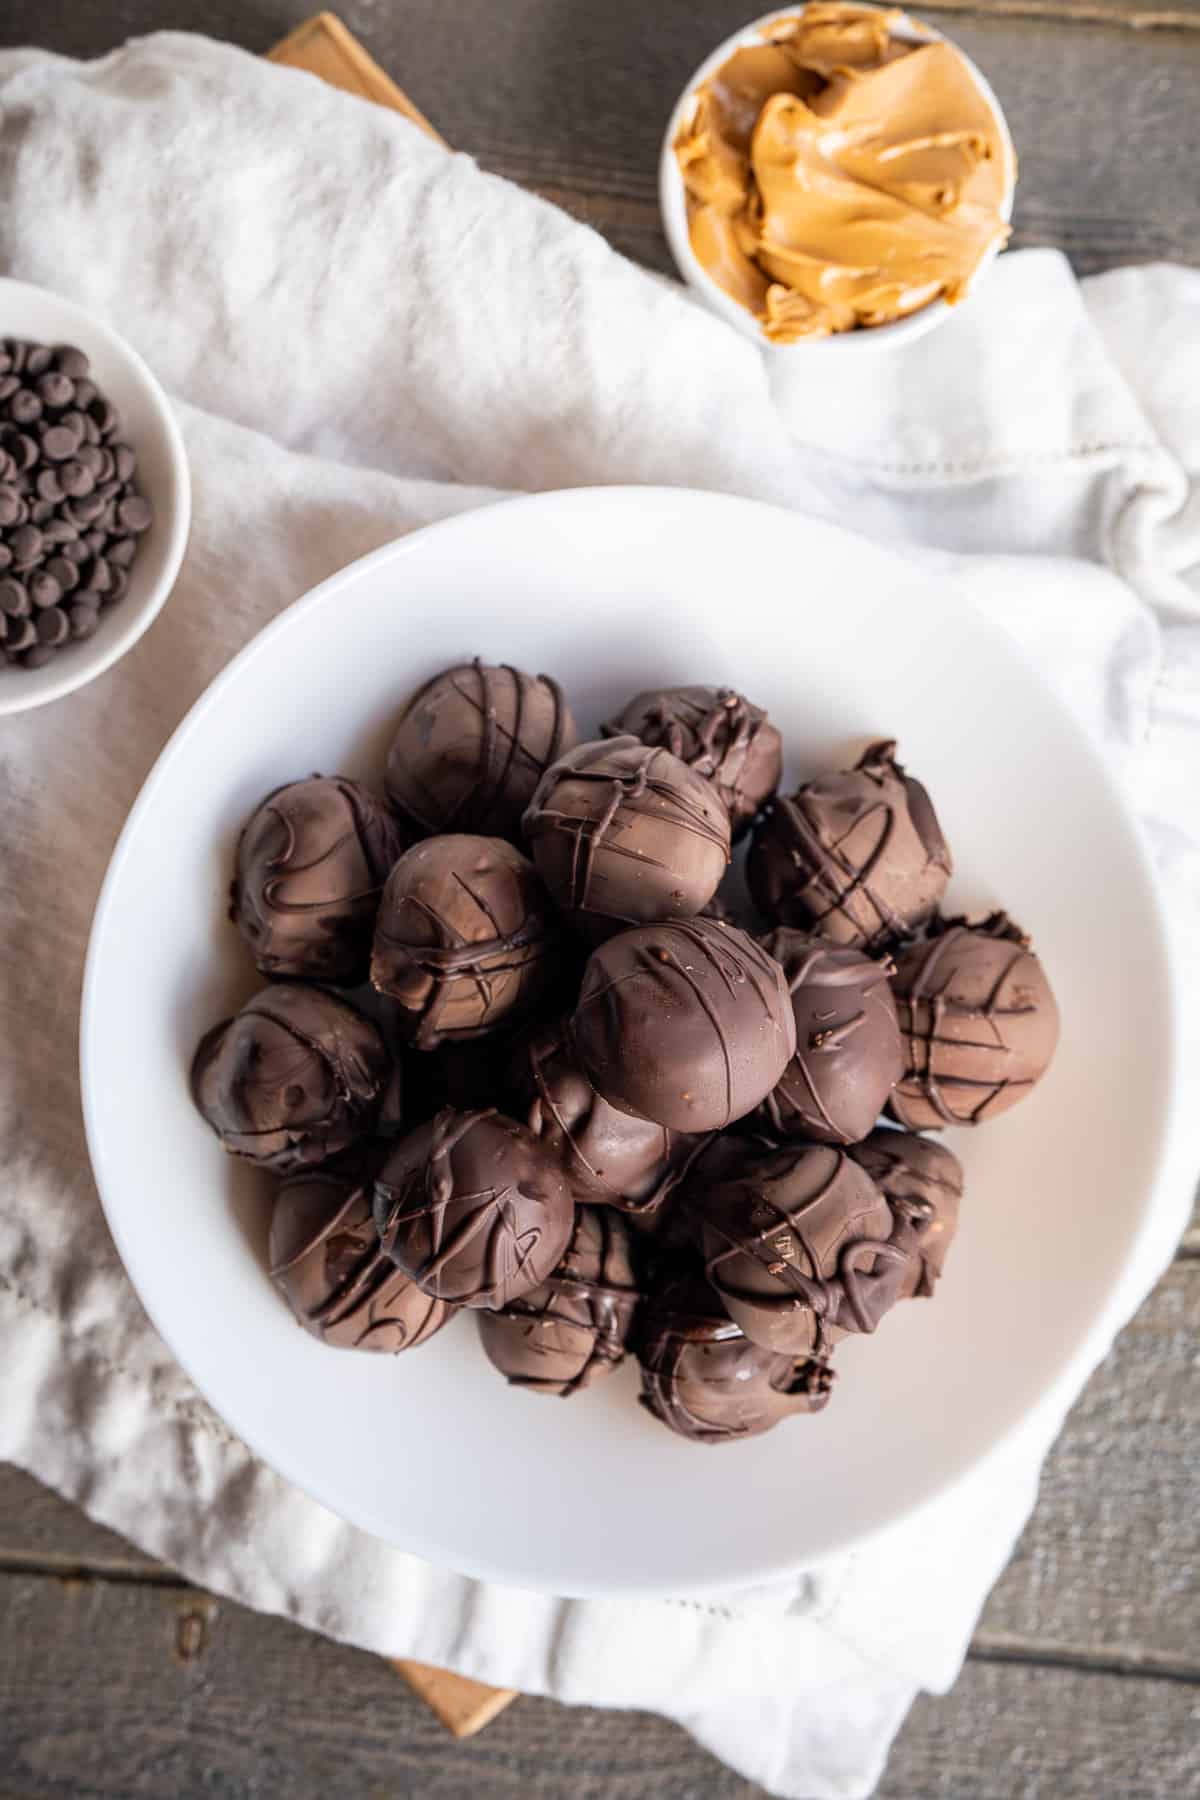
These No-Bake Peanut Butter Truffle Balls have a chocolate shell with a sweet, creamy peanut butter filling. They need only 8 common ingredients and less than 30 minutes of hands-on time. They're the perfect easy homemade Reese's treat for Valentine's Day, Christmas, or other special occasion.
With dairy-free butter and chocolate, they are easily made vegan as well.

No Bake Peanut Butter Balls are the perfect easy cool weather treat! In the summer, there's a risk of melting, so I typically make these in the Fall, Winter, and early Spring months. Shape the filling balls as eggs and you can also serve them as peanut butter eggs for Easter!
I almost always make these Peanut Butter Truffles at the same time as my festive Dark Chocolate Maple Buttercream Candies and Gluten-Free Peanut Butter Cookies because they use similar ingredients.
In my experience, any chocolate-dipped treat goes over well with a crowd. All of these gluten-free treats are easily passed as "normal", even when making the vegan and gluten-free versions.
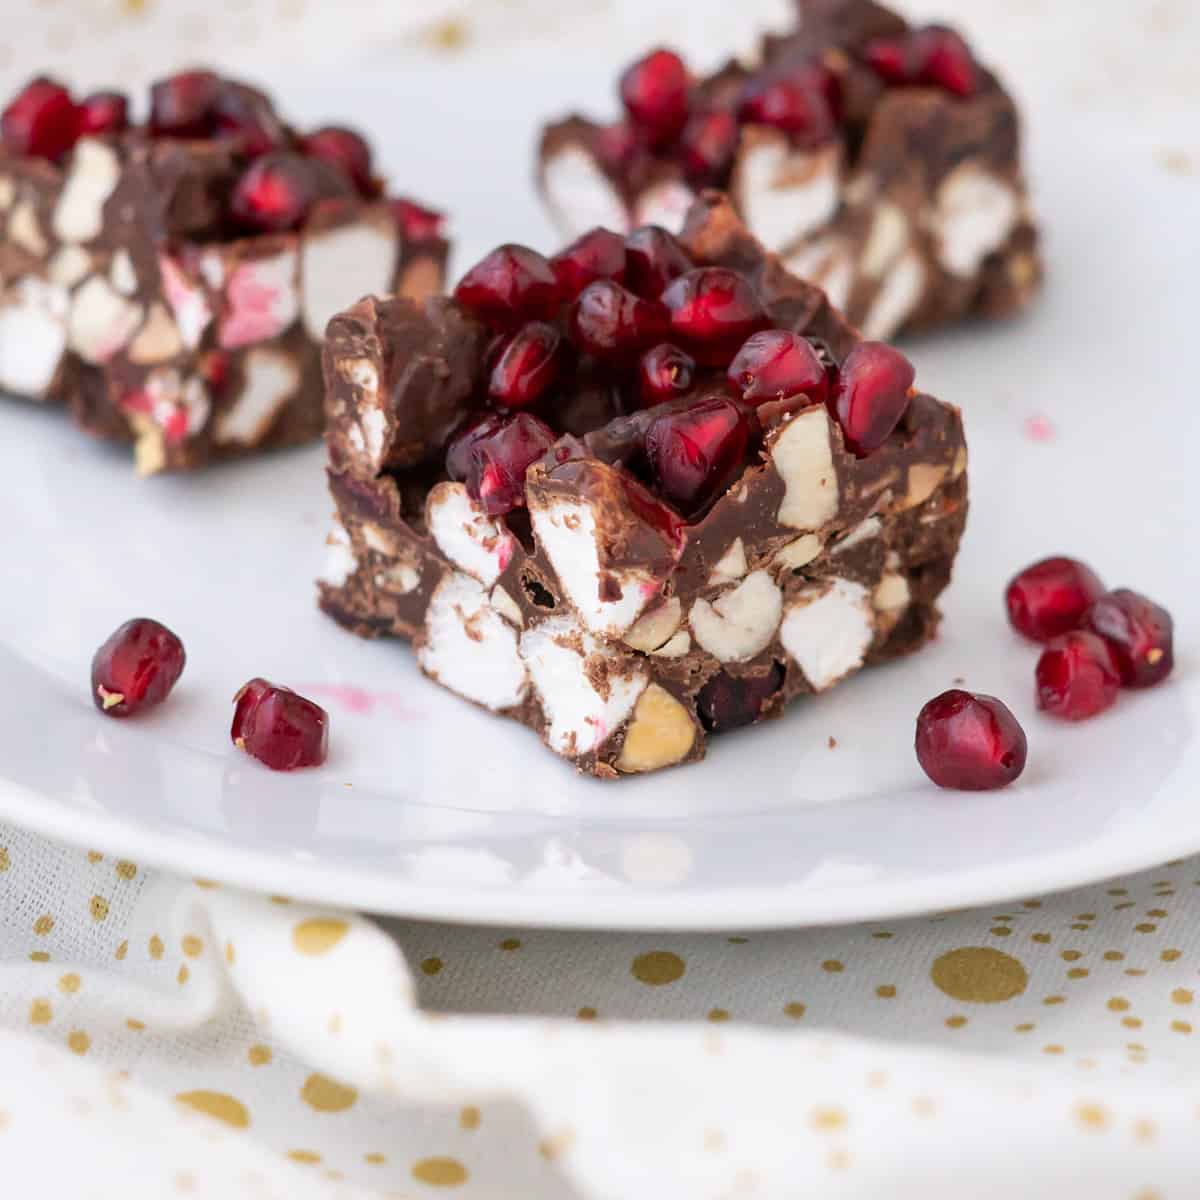
For more chocolate candy recipes, also check out my S'mores Bites and Christmas Rocky Road, and Chocolate Dipped Strawberries.
For another version of these peanut butter truffles, try my much-loved Date-sweetened Chocolate Peanut Butter Balls!
Jump to:
How to make it (with photos)
Ingredients Notes + Substitutions
One of the best things about this recipe is that it uses only 8 ingredients that are common pantry staples!
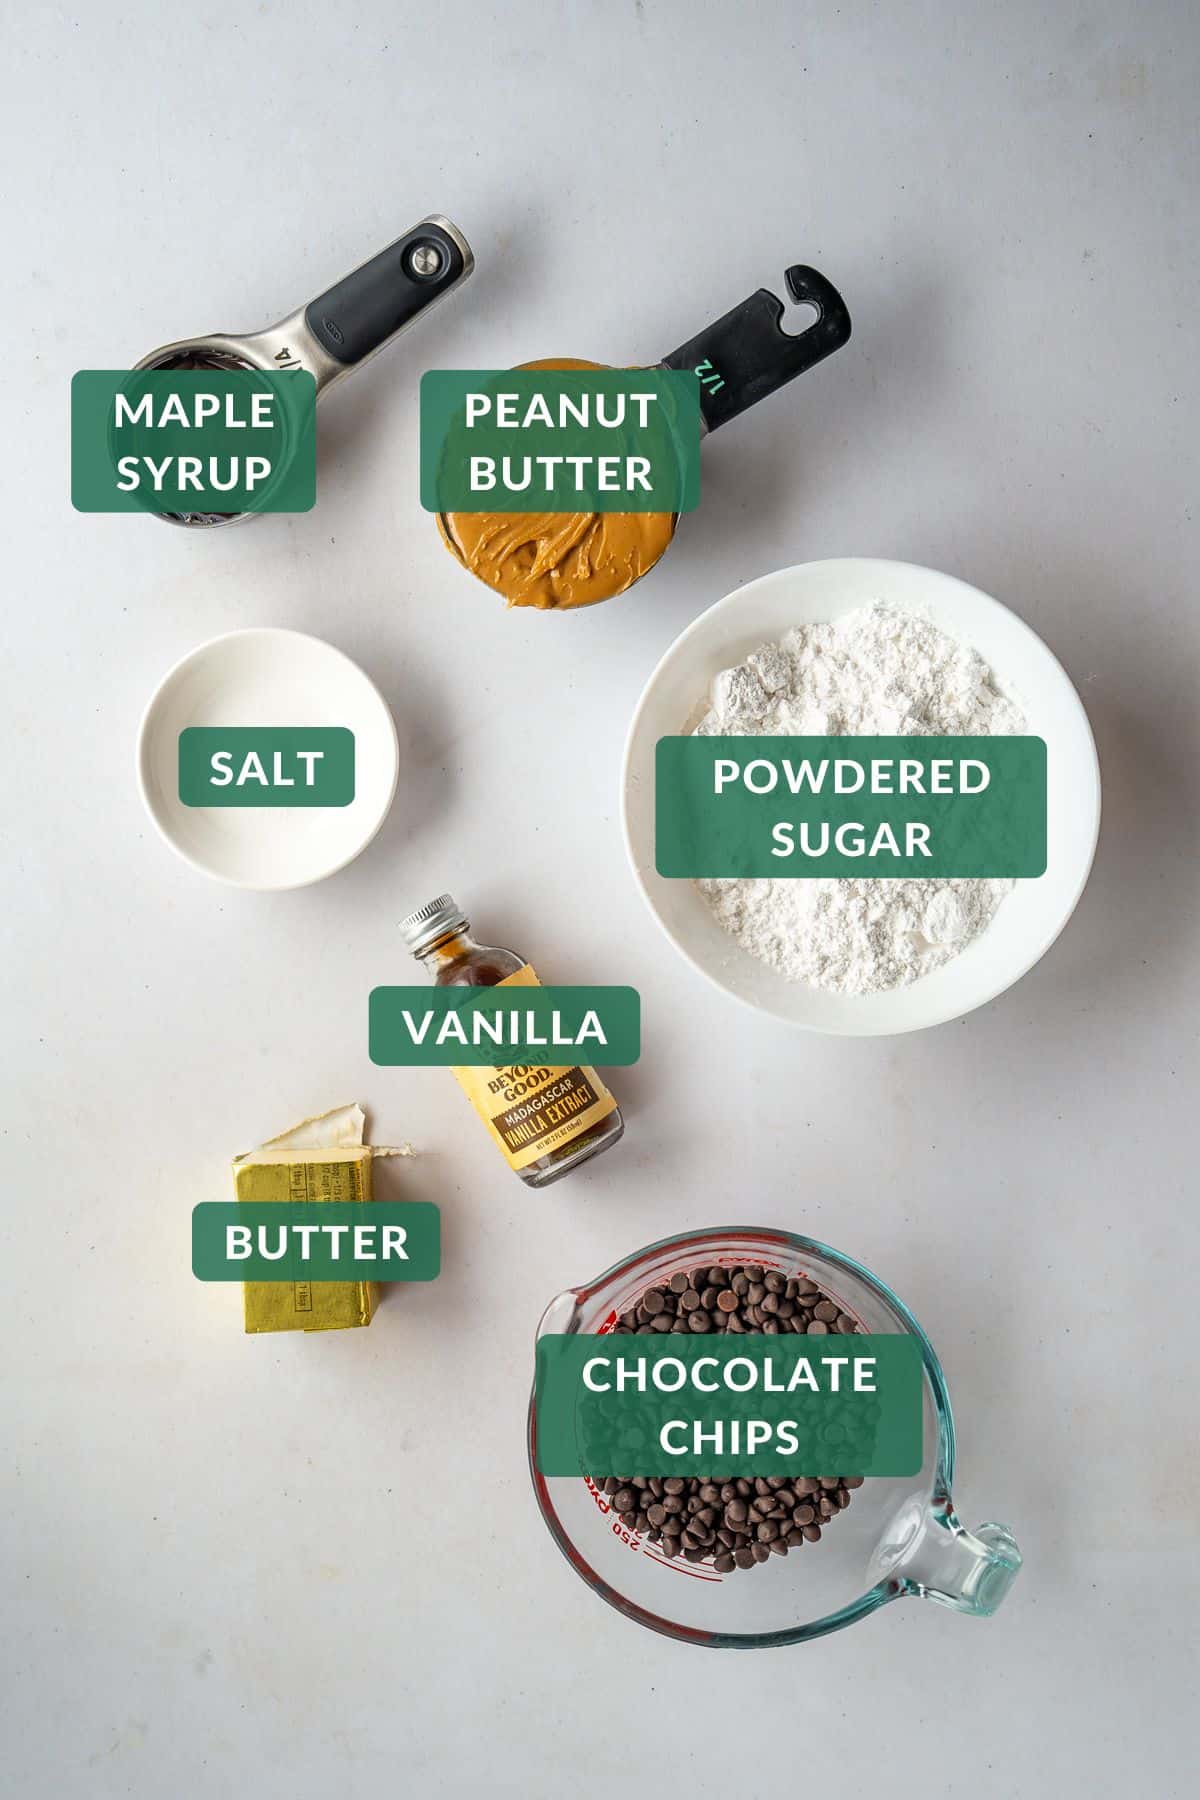
- creamy peanut butter - I like to use a very smooth creamy butter without added sugar so that I can control the sweetness. My favorite for this recipe and my gluten-free peanut butter cookies is Skippy Creamy No Sugar, since it is ultra creamy. It's also labeled gluten-free.
- salted butter - Regular salted butter and vegan butter (like these vegan buttery sticks) both work well in this recipe. If using an unsalted butter variety, add an additional ⅛ teaspoon of salt per batch.
You also need maple syrup, vanilla extract, salt, powdered sugar, chocolate chips, and the tiniest bit of vegetable oil to make this recipe.
See the recipe card for a full list of ingredients and quantities.
Variations
Here's how I adapt this recipe to fit multiple dietary needs:
- Vegan - For a vegan version of this recipe, use vegan butter, vegan-friendly chocolate chips, and organic powdered sugar to ensure vegan friendliness.
- Gluten-Free - For a gluten-free version of this recipe, I like to use Skippy peanut butter and Enjoy Life chocolate chips. Most powdered sugar brands are gluten-free, but I recommend checking the ingredients label just in case. I use C&H Brand powdered sugar or Wholesome Brand for corn-free powdered sugar.
- Dairy-Free - Use dairy-free chocolate chips and butter. I like Enjoy Life Chocolate Chips and Earth Balance Vegan Buttery Sticks.
Step-by-Step Instructions
You need about 30 minutes of hands-on time to complete the three steps in this easy peanut butter candy recipe!
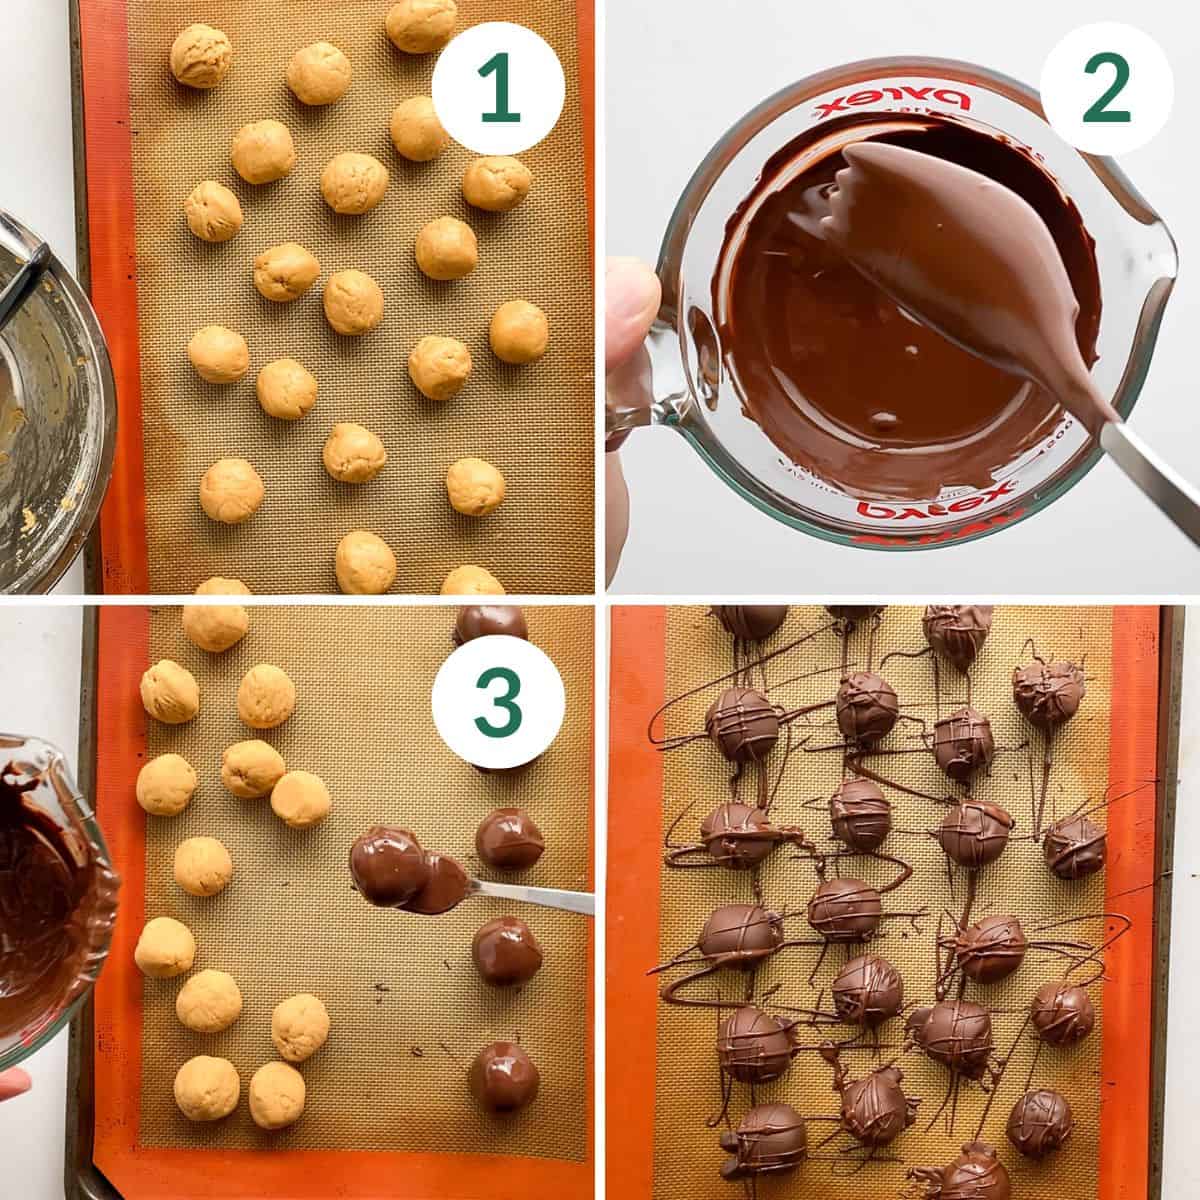
- Filling: In a large mixing bowl, add the peanut butter, butter, maple syrup, vanilla extract, and salt. Mix using an electric mixer until well combined. Add the powdered sugar and mix until smooth and creamy. Use a melon baller or tablespoon measure to scoop the filling into rounded tablespoons and roll into balls using your hands. Place them on a baking sheet or pan in a single layer with a little space between (to prevent sticking). Then place them in the freezer for 1 hour.
- Chocolate: About 10 minutes before taking the filling out of the freezer, combine the chocolate and vegetable oil in a liquid measuring cup or jar with a wide opening. Microwave in 20 second increments, stirring frequently, until the chocolate is melted and smooth. Give the mixture a stir and allow it to cool for 5 minutes.
- Dip: Line a baking sheet with parchment paper or a silicone liner. Then drop each cold filling ball into the melted chocolate mixture and use a fork to scoop it back out. Drag the bottom of the fork along the top rim of the glass to remove extra chocolate. Place the dipped peanut butter ball onto the lined baking sheet, leaving a little room between each one. When all balls are dipped, drizzle any extra chocolate on top for decoration. Then refrigerate for 30 minutes or until the chocolate has hardened.
Expert Tips
Make these Peanut Butter Balls perfectly on the first try. And pick up some new candy-making expertise!
Stir the chocolate frequently to prevent burning.
If you melt the chocolate by microwaving, it is necessary that you stir the mixture frequently. Otherwise the uneven heating in the microwave can burn your chocolate.
Chocolate that is burned will be thick and chunky instead of smooth. While it cannot be used for this recipe once burned, it can be used for hot chocolate. See my Microwave Hot Chocolate with chocolate chips recipe for how to use burned chocolate.
Adjust the powdered sugar amount to your desired filling consistency.
As written using my recommended peanut butter brand, this recipe will give you a soft truffle-style filling. For a thicker filling, add a little more powdered sugar. For a softer filling, add less powdered sugar. Know that the filling will solidify more when cooled in the freezer before dipping in chocolate.
Different peanut butter brands with different consistencies and textures will affect the filling texture.
Recipe FAQs
Here are some frequently asked questions about making no-bake peanut butter truffles. Don't see your question? Leave it in the comments and I'll answer within two business days.
Store leftover no bake peanut butter balls in an airtight container in a cool part of the kitchen for up to 7 days. Add a small towel or paper towel to the container to absorb any excess moisture. Replace the towel if it dampens.
Absolutely! I think this recipe is made even better with a quality dark chocolate bar in place of all or some of the chocolate chips. Simply replace the chocolate chips with a chocolate bar, measuring by weight for accuracy.
Adding a small amount of oil to the dipping chocolate helps to thin the chocolate layer so it is a good thickness for truffles and chocolate candy. Otherwise, the chocolate shell can get thick and gloopy.
Absolutely! While microwaving chocolate is the 'quick and dirty' method of melting it, the double boiler is much more reliable and less likely to burn the chocolate. For a makeshift double boiler, simply combine the chocolate and vegetable oil in a medium heat safe bowl. Then heat a small amount of water in a medium pot on the stove and place the bowl on top. I use a pyrex glass bowl over a small pot set on medium-high heat. Stir the chocolate frequently until melted and smooth.
Chocolate that is burned will be thick and chunky instead of smooth. While it cannot be used for this recipe once burned, it can be used for hot chocolate. See my Microwave Hot Chocolate with chocolate chips recipe for how to use burned chocolate.
Related chocolate candy recipes to consider...
If you love homemade chocolate candies, you will also love these other amazing chocolate recipes!


And if you love your chocolate with a side of chocolate, definitely check out my favorite hot chocolate recipes: Microwave Hot Chocolate with chocolate chips, Thick Italian Hot Chocolate, and Peanut Butter Hot Chocolate with cocoa powder.
Love this recipe? Please leave a 5-star 🌟🌟🌟🌟🌟 rating in the comment field below. Thank you!
📖 Recipe

No Bake Peanut Butter Truffle Balls
Ingredients
Filling
- ½ cup creamy peanut butter
- 5 tablespoons salted butter softened at room temperature
- 3 tablespoons maple syrup
- 1 teaspoon vanilla extract
- ⅛ teaspoon salt
- 1 cup powdered sugar (108 grams)
Shell
- 1 ½ cup semi-sweet chocolate chips (300 grams)
- ¾ teaspoon vegetable oil
Instructions
- Filling: In a large mixing bowl, add the peanut butter, butter, maple syrup, vanilla extract, and salt. Mix using an electric mixer until well combined. Add the powdered sugar and mix until smooth and creamy. Use a melon baller or tablespoon measure to scoop the filling into rounded tablespoons and roll into balls using your hands. Place them on a baking sheet or pan in a single layer with a little space between (to prevent sticking). Then place them in the freezer for 1 hour.
- Chocolate: About 10 minutes before taking the filling out of the freezer, combine the chocolate and vegetable oil in a liquid measuring cup or jar with a wide opening. Microwave in 20 second increments, stirring frequently, until the chocolate is melted and smooth. Give the mixture a stir and allow it to cool for 5 minutes.
- Dip: Line a baking sheet with parchment paper or a silicone liner. Then drop each cold filling ball into the melted chocolate mixture and use a fork to scoop it back out. Drag the bottom of the fork along the top rim of the glass to remove extra chocolate. Place the dipped peanut butter ball onto the lined baking sheet, leaving a little room between each one. When all balls are dipped, drizzle any extra chocolate on top for decoration. Then refrigerate for 30 minutes or until the chocolate has hardened.


Jan says
These delicious peanut butter truffles were surprisingly easy! If I had known how easy it was to make peanut butter truffles, I would’ve been making them myself the whole time. Thank you for the easy to follow recipe!
Jana says
These are a very good way to treat a peanut butter or Reese’s lover! An easy recipe and so so good.
Amy Pennies says
Does the powdered sugar get mixed in with the peanut butter mixture? It’s not listed in the instructions, only in the ingredients.
Jamie says
Yes, thank you for the note Amy! I fixed it in the post and the recipe card.
Clara says
I love the creamy truffle filling! These are my favorite peanut butter balls. I make them with dairy-free butter and it works great.
Jamie says
I'm so glad you enjoyed it Clara! Thank you for being the first reviewer on this recipe 🙂
Beverly says
Easy recipe with few ingredients. I made these for an addition to a dessert table at a house gathering. The comments were “these even top Reese’s PB cups! Is there any way to keep the chocolate from melting once they are served or do you just have to keep them refrigerated until ready to eat?
Jamie says
I'm so glad you enjoyed them! If you swap the vegetable oil mixed in with the chocolate with coconut oil, it will help a bit with the melting. But after about 70 degrees F, it's best to keep them refrigerated until just before serving.